Interior Replacement 101: Four Interior Fixes To Smarten Up Your Car
Fixing up or replacing a car’s interior is usually one of the last things you think about. Unless it’s in an appalling state (think trim hanging off, stuffing spilling out of seats, etc), you probably just leave it while working on something more exciting. Thing is, while the interior might not be the most interesting part of a restomod project, it’s crucial. Think of any of the great restomods you’ve seen, either on this site or elsewhere. The true greats don’t just focus on what’s under the hood, they care about aesthetics. Whether you want a nice rich purple carpet to match your car’s paintwork, or want to restore a car to its former glory, the interior helps the whole car pop. In this article, I’m going to give you some tips and how-tos on switching out your old interior for something amazing.

I’m going to start off with the harder fixes, and move on to the easier ones. Replacing seats can be irritating. There’s a lot of steps to get 100 percent right, from choosing the seats to installing them. You’ll want to make sure that you get a replacement that will fit, or be very close to, the runners that the original seat had, and, obviously, that will fit the car. There are other things to watch out for too. Are the buckles of your seatbelts fixed to the seat? If so, you’ll need to find replacements that are the same, or face having what is essentially just an unfashionable sash, with more modifications required to fit a new buckle.
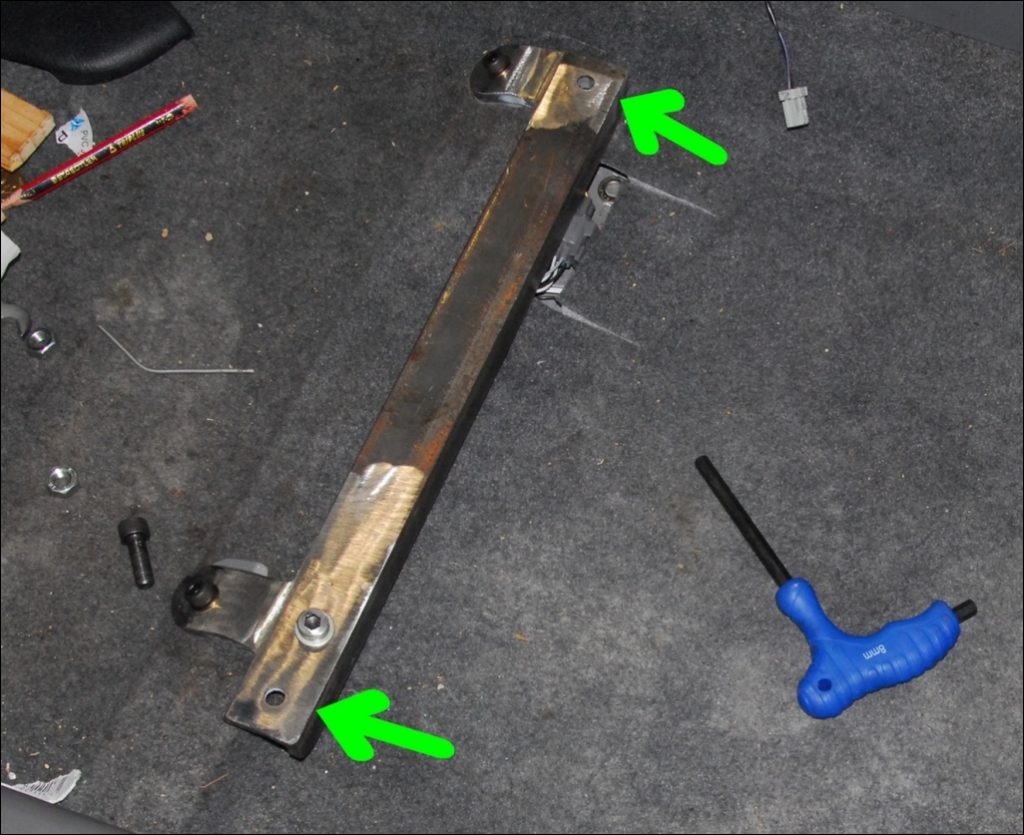
Removing the seats is fairly easy, and is also vital to some other modifications, which I’ll get into later. To remove them, you’ll need the typical mechanic’s tools of a screwdriver, socket set, wrenches, etc. In cars that are likely to be restomod fare, the seat may be bolted into the floor, but the procedure is just the same as if it’s on a mount. Firstly, remove any seatbelt buckles, then find the four bolts, two up front, two in the back, which join the seat to the floor. Undo those with your wrench (preferably with someone or something to keep the seat upright and not crushing your thumbs,) and take the seat off its runners and fit it through the door.

When fitting new seats, you can account for size differences with a little bit of DIY improvisation. For example, if the new seat’s mounts aren’t in the right place, you could drill holes in the front rails, join the rails to increase integrity, and then create brackets which you attach to the rails to match the car’s mount points. Bolt the new seat back in, and you’re good to go! If you do decide to go the DIY installation route due to incompatibilities, just make sure that it’s firmly secured before you hit the road.

Replacing the carpets is another key step in making your restomod look its best. Whether you want it to match the exterior or complement it, it’s a step that’ll be irritating and make you want to put up with the old cigarette-stained one you’ve got, but you should do it. To replace the carpet, you’ll need to take the seats out, unbolt the seatbelt mounts, remove the centre console (the procedure for this varies a lot between model, so look yours up before going gung-ho with your tools,) kick panels, trim, and anything that’s going to stop you getting the carpet out cleanly. Remove the old carpet and use it as an outline, putting it on top of the new one, and cut the newer one slightly larger. You can always trim any excess off, but you can’t put it back on, unless you get very creative with duct tape. Reinstalling it is simple, you just need to reverse the last few steps, replacing the trim, seats, console, etc. If there’s any excess carpet, just cut it off with a utility knife.

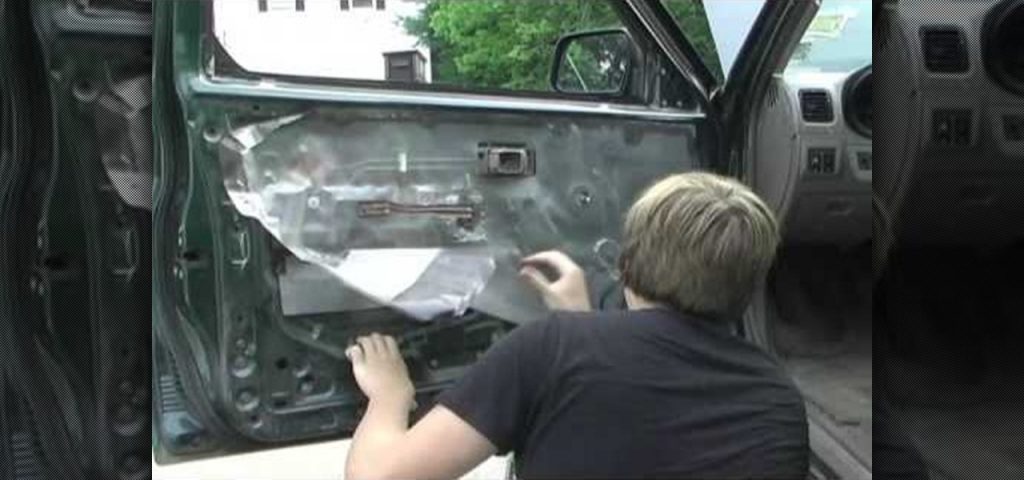
While the carpets are more obvious, another modification that can dramatically improve a car’s looks is replacing the door panel. No one likes to look at a slowly rotting or extremely faded door panel. It’s also a good opportunity to fix any lingering issues you may have been putting off, such as a sticky window, as this is how you get at the mechanisms. While the ways in which the panels are attached varies, the screws which join fixtures to the panel and the panel to the door are hidden behind small access panels on the door itself. Open these up with pliers, or a flathead screwdriver, and you can start disassembling the panel. You may see tabs which attach the door to the panel once you’ve taken some fixtures off, which can usually be unscrewed themselves. There may also be a small U-shaped hook at the top of the door, which you’ll need to pull the panel off. Unhook any cable harnesses for things like power windows, and remove the panel. Replacing the door panel is a simple matter of reversing the process, but once you’ve connected the cables and harnesses, check that the doorhandles work as they should. You don’t want to have to go through the hassle of doing it all over again.

Lastly, I’d like to talk about resurfacing your dash. There are other, more complex items you can replace in the interior, i.e. gauges and your steering wheel, but I’ll come back to those another time, as each one of those will require a lot of discussion. A faded, cracked, stained dash, though? That’s easy to fix and looks terrible, so I wanted to let you know how you can fix it. The easiest way is to just glue new vinyl over the old and tattered surface. You’ll want to pick a nice strong vinyl that’s not going to bleach easily, and in a color that matches or complements your carpets and seats. Once you’ve got the vinyl, and some industrial adhesive, you should lay out the new vinyl over your dash, and trace your way around it with a pen, marking where there need to be gaps for vents, etc. Cut out the holes with a utility knife, and check the vinyl now fits perfectly. Put a thin layer of glue on your dash (with the windows open, so you don’t huff more glue than an entire Ramones audience in 1977,) and lay the vinyl over the top, smoothing it first into the gap below the windshield and working your way back. Keep your eyes peeled for any bubbles or ripples which will affect the finished product. Leave it for around 24 hours to fully bond, and you should be left with a dashboard that looks as good as new!
Recent Posts
-

Reegan Is Building This 1975 Dodge Ramcharger For One Lucky YouTube Subscriber
August 13, 2025Update 08/15/25: Reegan now has an all new aluminum radiator installed with dual electric fans. The Wilwood master cylinder is installed along with an EvansCNC…Read more -

Let's Turn a 1970 Plymouth Roadrunner into RestoMods Royalty
August 8, 2025Update: 8/8/2025 A little over a year ago we purchased a beautiful 1970 Plymouth Roadrunner from a local collector car dealership Bayside Auto. We knew…Read more -

The Ultimate 1968 Dodge Charger HELLCAT Build
August 8, 2025Update 8/8/25: Back in January of 2024, we purchased a 1968 Charger shell from Mopars 5150. They specialize in all things Mopar and had a…Read more
Become a Car Club Member
Car Club Members Get Entries to Win, Discounts in our Shop, Discounts with our Preferred Partners and more!
Membership benefits
By joining the RestoMods Car Club Today, you will receive amazing perks plus 15 bonus entries into our sweepstakes for every month you are an active member
-
Auto Discounts:Curated Discounts From Your Favorite Parts Companies
-
Restomods Monthly:Monthly Magazine With The Latest Industry News
-
Classified Ads:Get Free Postings seen by 300,000 enthusiasts monthly
-
Car Show Tickets:Check out the biggest vintage car shows on us.
-
Exclusive Car Deals:First chance to purchase any prize cars not selected


Restomods on Instagram
Follow us on Instagram and other networks


